Showing posts with label Crafting. Show all posts

Wednesday, May 21, 2014

Let's Get Personal...With Art

Taking it down a notch (or ten) from this Monday, I'm back to crafting. It's not another quilt...it will be a while before I can tackle one of those again. It's some personalized nursery art. Of course it involves the artistry of your little one, making it doubly personalized (and doubly awesome). 

Again, I should apologize for the iPhone photos, though I think in this particular post it's only enhancing the free-flowing, impressionist style of my daughter's work.


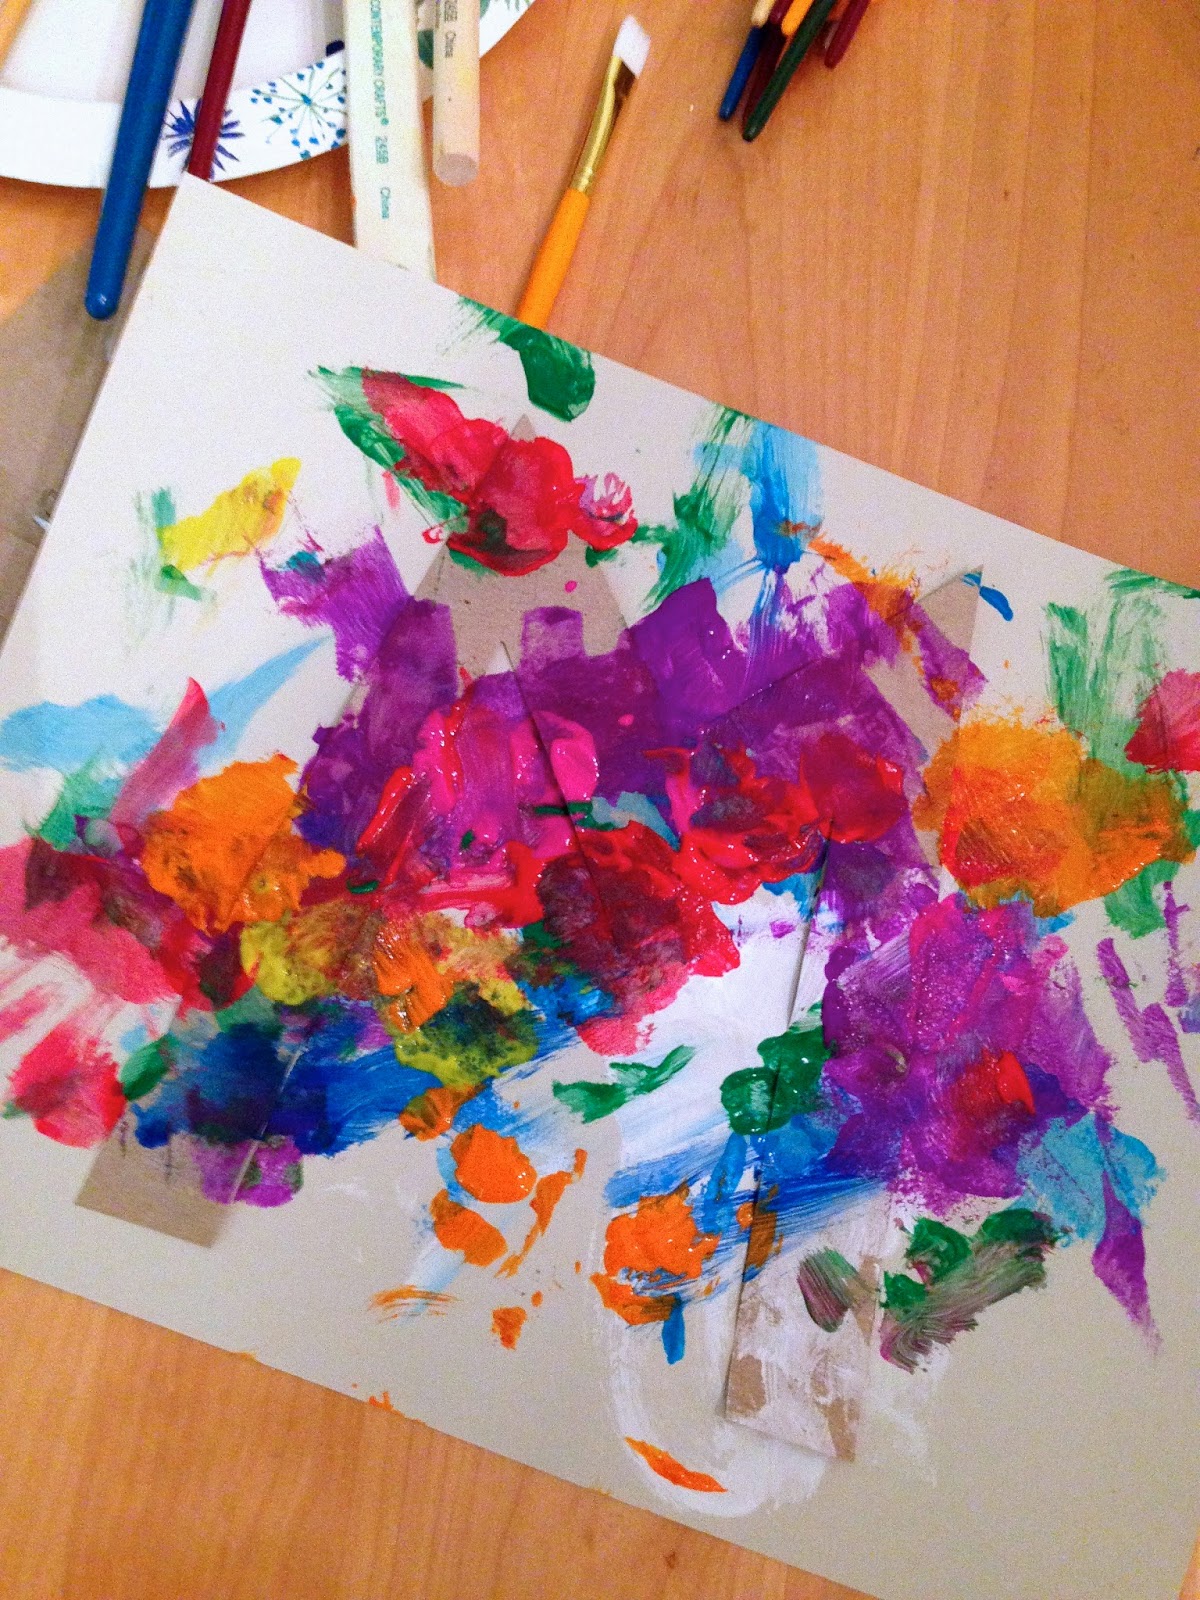
The execution was pretty simple. First, I cut a letter "M" out of some scrap paper. Next, I taped the M to a piece of card stock using little circles of scotch tape. I chose card stock instead of regular weight paper because my daughter tends to paint with thick layers and regular weight paper has a hard time handling her magic. She's great at blobbing and blotching. 


Then I let her do her thing. Typically brown and purple are her favorite colors to work with, but for this particular project she went full rainbow. It's hard to see the M in the painting below, but it's there.


I let it all dry, then I gently peeled off the M. Ta Da! A sweet, frame-worthy creation. I absolutely love it.


I love painting and I think my little lady is taking to it as well. Speaking of those who love painting -  did anyone else read Taylor Kinney's interview in which he talks about how he and Lady Gaga love painting together. I bet some freaky stuff goes down in those creative sessions.

Monday, May 12, 2014

I Made A Quilt

I took my crafting to the next level with the grand daddy of sewing adventures - a quilt.


I started in February and finished two weeks ago. I didn't work on it very consistently, sometimes I'd go a week or even two without any progress. Even so, it clearly took a while. The finished product is pretty fantastic. It's full of wiggled lines that should be straight and misaligned fabrics, but that adds to the charm. Most importantly, my daughter absolutely loves it.


It's toddler bed sized. Though, as you learned last week, I have no intention of transitioning my little lady to a toddler bed any time soon and due to her "active" sleeping she is best suited for a wearable blanket. For now, she admires it (which makes me so happy), rolls around on it and snuggles with it during nap time.

Rather than walk you through a step-by-step guide of how I made it (because I'm totally unqualified and I'm not fully sure how it came together), I'll just give you the highlights. To begin, I went to Pinterest - the starting point for all great DIY projects. A bit of searching led me to a handful of tutorials. To make the front of the quilt, I used a guide from Film in the Fridge. To make the back of the quilt and sew together the front, the filling and the back (basting), I looked at a bunch of blogs and made my own way. To create the thin border (the binding), I used a guide from Make It & Love It.

As far as my gear (my quilting gear) - I didn't get any. I couldn't bring myself to purchase all the "necessary" accoutrement simply because it was pretty expensive and I didn't want to make the commitment. I wasn't certain that I'd even finish this quilt much less take on future quilts. Not having a rotary cutter or cutting board or marking tape or curved safety pins or massive ruler didn't stop me, nor did it significantly affect my finished product. BUT, if I do it again, I will pick up a rotary cutter and cutting board. Cutting fabric with greater precision will make for a better quilt (especially if I use a more complicated pattern) and it will save me time. A lot of time.


I fell in love with the multi-color bunting fabric, which I found on Fabric.com, and chose the other fabrics based on the color scheme of my daughter's room (pink and red - read more about that here) and what was available at my local Joann Fabric. I played around with the order of fabric strips for a while and took a photo when I finally settled on a pattern (great tip from Film in the Fridge). One early mistake I made was not paying attention to the direction of the bunting pattern. In some strips the bunting faced upward and in others it faced downward. I realized this after I had sewn a whole bunch of strips together...and had to take them a part. So, great tip from NSB: pay attention to the direction of the pattern!

I found the basting to be the most difficult step. I found the binding to be the most satisfying. It was a great project and I'm already thinking about my next.


Friday, April 25, 2014

The Garland is Done, Man

It's all done. And I think it's puuurty.


So, before I give you the details, let me first apologize for the pitiful photos. They were taken with my phone on a rainy day (there was minimal natural light...and I hate taking flash photos).

Here's how part two of the garland project went down (click here for part one). First, I decided how long I wanted the garland to be. This was dictated by the number of hearts that I had made (16) and how far apart they would be on the twine (6-8 inches). I pulled the twine to the right length according to my estimation (this wasn't a precise process), but before I made my cut I decided that a single strand of twine wasn't going to work. The twine, as is, didn't seem substantial enough to do the job. My plan became to braid three strands together. With this in mind, I cut three pieces of twine substantially longer than I had calculated because I wasn't sure how much length I would lose in the braiding process.

I knotted the three strands together and used a binder clip to attach the knotted end to a chair. I intended to stand up, pull each strand taut and braid. It didn't really work because the strands were crazy long. I ended up winding each strand in circle and securing it with it's own binder clip, making each strand shorter and easier to work with. When the base of my braid hit the binder clip I would unwind some of the twine and re-clip. Am I boring you yet? Just know that this part was unexpectedly difficult and took a while.

Here's the end of my knotted twin clipped to a spindle on a chair.

Here is the finished braid.
It's a pretty lose, which was intentional.
You could certainly make a tighter, more defined braid.

Once the twine was successfully braided, I began to attach each heart. I used red thread and sewed by hand.


Above shows the twine attached to a pink heart. I chose a back side of each heart and sewed the twine on that side rather than on top (where the heart indents). I experimented with sewing it on top and I didn't like seeing the thread on the front. But, I'm a total amateur at this sewing bit so a more seasoned pro may choose otherwise because they can stitch more neatly than I.


That's what it looks like from the front - you can't see how the twine attaches. I didn't use a ruler to make sure each heart was exactly the same distance apart, I just kind of eye balled it. The imperfections add to the charm.

After about an hour of work, bringing the total project length to three hours, it was ready to be hung. Truth be told, I hung it up for your benefit and took it down shortly after taking the photos, so don't be freaked out by the fact that it looks like my daughter could reach out, grab the twine and seriously injure herself or her teddy bear. My current digs are temporary, hence the extremely sparse decor. I will give you an update post when this beautiful creation finds a permanent home in my soon-to-be permanent home.


Thanks to the low quality photographer photograph, you can't see the color gradation between the hearts, but it does exist. There are four colors in total - pale pink, coral, bright pink, red.


And that's that. 

Any crafting projects planned for your near future? I'm in the middle of a quilt - that's right a quilt. It's my first and I'd love a few insider tips if you have any. Have a great weekend.


Friday, April 18, 2014

DIY Felt Heart Garland

As promised in this year's Blogiversary (aka blogging anniversary), I'm crafting again. Wait! Before you immediately click out of this post because my last crafting attempt was so painfully weak that you can't stomach the thought of suffering through a similar embarrassment, please give me another chance and keep reading. Everyone deserves a second chance. Novice crafters included.

A while back, I was inspired by an image of felt hearts that I came across on Pinterest. I'd love to share this image with you, but I believe it's against blogging rules (here is the link if you're interested). My idea was to make the felt hearts and string them together in a garland or, if you're British, bunting. I wanted to tweak the hearts a bit...well...I'll just show you because months after finding this inspiration, I actually did it.


There she is, my first felt heart. Not too bad. But, let's back up.

I got all my supplies at Joann Fabric because there's a store really close to where I live. These supplies are super basic and you can get that at any craft store or Amazon.com or even Target. The supplies include 8 sheets of 9" x 12" felt, polyester fill (that gauzy material inside stuffed animals) and a roll of twine. For the felt, I chose four colors (pale pink, coral, bright pink, red) and got two sheets of each color. I own a sewing machine (this one) and white thread.

My first step was to cut all the felt in half and then half again.

Above is my pile of felt and to
the right is a sheet of the pale
pink cut into four pieces.


Next, I made a heart template because I wanted my hearts to be roughly the same size. I didn't have any cardboard laying around, so I used a Carter's mailer. It was card stock, not quite as thick as cardboard, but worked just fine.


Starting from left to right (above): I used the piece of felt to cut a rectangle in the mailer, then I cut a heart (free hand) out of the rectangle. 

Next came the task of using my heart template to cut all the quartered, rectangular pieces of felt into hearts. It took a while to cut all 32 hearts (8 sheets, each cut into 4 rectangles). I got lazy halfway through and cut two hearts at a time. I now know that I could have been even lazier because having a perfectly shaped heart from the start isn't necessary (more on this later).

The plan was to pair off the hearts, sew the twosomes together and somehow stuff them with fill in the process. But I was a bit stumped when it came to the stuffing part - I didn't know how. My first thought was to layer the felt with fill, pin the whole thing together and then sew. Within seconds, that idea fell to the wayside because it seemed too difficult and too time-consuming.


Above is the layered heart and fill. Not a great plan. My next idea was to begin sewing the two felt hearts together, leave a small gap before finishing, stuff the heart while it was still on the sewing machine, then finish out the sewing. Below is a photo of this method...I admit that it's not a masterful idea, but I'm neither a masterful craftsperson nor a masterful seamstress...so it was fine by me. And, most importantly, it worked.


I would just push the fill into the small whole at the bottom until the heart was full and then finish sewing.


Above is an action shot for ya. Don't worry the sewing machine was off...I think. There were definitely bumps along the way. I'm still not great with my sewing machine (see below), but overall they came out pretty well.


I chose a zig-zaggy stitch setting on my sewing machine (#3 if you have the same machine) for a little flare. Also, after I completed each heart, I trimmed the outer edge to even out the shape - hence why it didn't matter whether the heart was perfectly shaped from the get go.


Above is my final batch - all 16. The low-tech photo taken by my iPhone doesn't show the range of color (at all), but in person it's a true spectrum of pale pink to fire engine red. The first 8 hearts took me a little over an hour to make and the second 8 hearts took me about half that time. In total, it was a two hour project. 

My next step is to use the twine and string them into a garland. If you've been relatively more impressed by today's crafting show - thank you and stay tuned for a post next week on the finished product. If you are, again, saddened by my attempt, you have my full permission not to read the follow-up post. My apologies.

What crafting projects have you embarked on lately? Ever followed through on a DIY project inspired by Pinterest? Oh, and what DIY/Crafting blogs do you read (and love)?


Monday, February 10, 2014

Simple (with a capital S) Toddler Valentine

Today, I'm venturing into unchartered waters here on NSB - I'm crafting.  Technically, I did the crafting last week and you're just reading about it now.  And, technically, crafting is a mischaracterization of what happened because I'm pretty sure that crafting involves skill and the following requires no skill (at all).  True crafters who make actual crafts will (understandably) poo poo my efforts, but I'm going out on a limb and sharing anyway.

Valentine's Day is nearly upon us (hint: it's this Friday).  This year, with the help of my delightful toddler, I decided to send homemade Valentine's to some long distance loved ones.  My little lady and I joined forces and came up a hand print heart Valentine.  Here is the play-by-play.

I bought red paint at Joann's Fabric.  The label said "washable" and "non-toxic", there were hand prints on the label...which is the centerpiece of the project...and it cost something like $5, so I scooped it.  I couldn't find a link on the Joann's Fabric website, but here is one on Amazon.


Before we got down to business, I did some quick prep.  The kitchen was our project site, so I removed all fabric items in arm's reach, including a couple dishtowels and a little rug.  I brought my daughter down to her skivvies diaper and put on an old t-shirt.  Even with the label saying "washable", I didn't want to take any chances.

At last, the fun began.  I squirted about 5 tablespoons (total guestimation) of red paint onto a paper plate.  I took my daughter's right hand and smooshed it into the paint.  Now, here's where one may argue that a slight amount of skill is involved: I pressed her paint-covered palm onto a piece of paper.  I had a stack of heather gray/brown 8x11" paper, but any paper would do (including standard white printer paper).  Sometime around print eight, she realized that she could make things other than the paper red.  Thankfully, I saw the bulb illuminate and immediately brought the project to a premature end.

Here is one of the hand prints.  As you can see,  it is by no means perfectly shaped.  None of them were, but they got the point across (the point being - this is the relative shape and size of my daughter's hand).


Above is the full paper perspective, so you get a feel for the true lack of precision - not only was the print itself smudgy, but there was no rhyme or reason as to where it landed on the paper.

The prints needed about two hours to dry.  Once dry, the mildly creative portion of the project began.  My idea was to use the shape of my daughter's hand to make a heart.  Originally, I planned to print both of her palms next to one another, thumbs touching, which I thought it would look like a heart.  But, after the successful albeit short-lived right hand printing, I called it a day while I was ahead.  So, instead of letting the hand print be the heart on its own, I added a little embellishment.  I made a faint outline of a heart with a pencil around the hand, using the shape of the hand to guide me.  Once my sketched heart looked relatively balanced, I traced over the pencil with a pink Sharpie, erased the pencil marks and added a Valentine's message with a fine tip red marker.  Ta Da!


Not too shabby.  I did another.  But, after the second, I couldn't take the smell of the Sharpie anymore.  My singed nostrils needed a break.  So, I switched to colored pencils for the remaining bunch.


Final step, I cut the paper in half (approximately), leaving me with 8.5 x 5.5" piece, which I then folded in half to make a card.  The hand print and note were on the inside and here is what I did on the outside...


I dug out a heart stamp and a purple ink pad (both were purchased from The Paper Source about 4 years ago) and fancied up the front of the cards with a heart or two (or ten) and the first half of the message (i.e. "Dear Mom" or "Dear Auntie").  Here's one to Grandma Rhoda.


And there you have it - a handmade hand print Valentine that is part adorable and part murder scene creepy.  I think our friends and family will love them...once they realize the hand print is made of paint and not blood.

Happy Valentine crafting.